


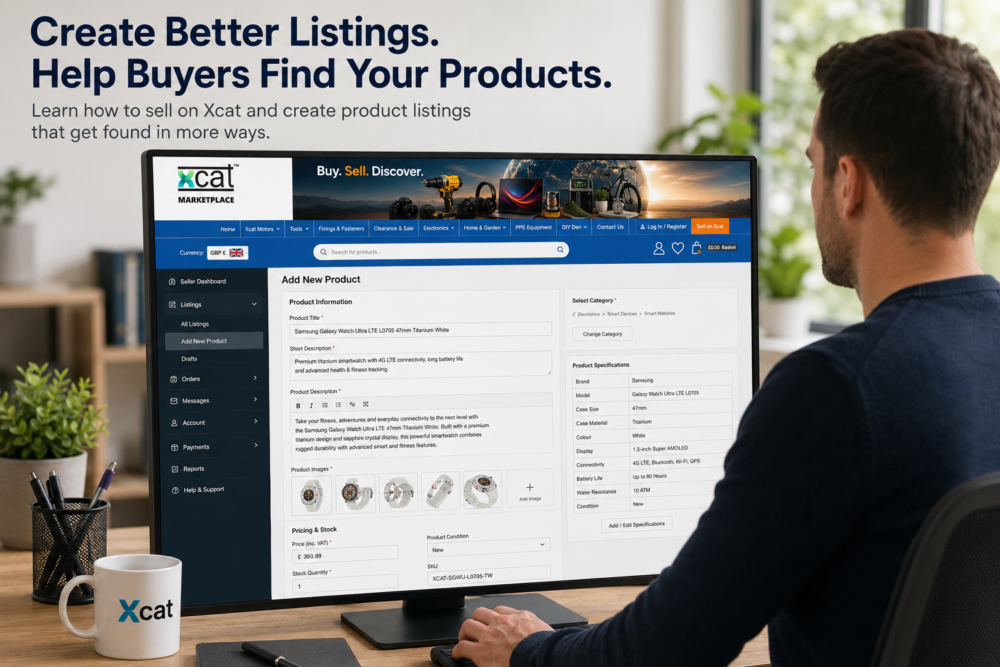
Would you like to sell online and reach buyers in your own country or further afield? Xcat is a borderless marketplace designed to help people and businesses list products from their own country and reach buyers wherever they can deliver. This complete guide explains how to sell online with Xcat, from registration and account setup through to listings, shipping, order processing, refunds, disputes, financial records and payouts.
Before You Use the Links in This Guide
You must first register for an Xcat account before you can sell online. After registering, Xcat will send you an email containing a link to set your password. Open that email, follow the link and create your password.
After setting your password, log in to your Xcat account and remain logged in while following this guide. The Seller Area pages and links below are protected account pages. If you are not logged in, a link may take you to the login page instead of the intended seller page.
If you have not received the password email, check your spam or junk folder and confirm that the email address entered during registration was correct.
How to Sell Online with Xcat: Complete Workflow
- Register, set your password and log in
- Open your Seller Area
- Complete My Shop Settings
- Configure Shipping Settings
- Prepare your product information
- Create and submit your listing
- Follow listing review and manage your products
- Receive and process orders
- Add carrier and tracking information
- Review sales and ledger records
- Handle refunds and disputes
- Request a payout
1. Register, Set Your Password and Log In
To sell online with Xcat, start by visiting My Account. Register using an email address that you can access.
When registration is complete:
- Check your email for the account message from Xcat.
- Open the link in that email.
- Create and save your new password.
- Return to My Account and log in.
- Remain logged in while using the Seller Area links in this guide.
Your account provides access to purchases, messages and the Seller Area. A standard seller does not need separate seller approval before creating a listing. Xcat still reviews new listings and material product changes before they are published.
Important: Approval is required only when applying to become a Fulfilment & Sales Associate. That is a separate role from ordinary marketplace selling.
2. Open Your Seller Area
Once logged in, open the Seller Dashboard. This is the starting point for your activity when you sell online through Xcat.
The Seller Area provides access to:
3. Complete My Shop Settings
Before you sell online or submit your first product, open My Shop Settings and complete the available seller and shop information.
Use accurate, professional information. Your shop details help buyers understand who is supplying their product and support Xcat's seller, shipping, currency and fulfilment systems.
Check that your account country is correct. Your country can affect:
- Your seller currency
- The carriers normally displayed in Shipping Settings
- Available shipping coverage and services
- Payout methods and banking information
- How amounts are presented in your Sales Ledger
If your country or currency is wrong, contact Seller Support before creating financial records. Historic orders, ledger entries and payouts must not be silently changed by a later currency correction.
4. Configure Shipping Settings Before Listing
Reliable delivery settings are essential when you sell online. Open Shipping Settings before publishing products. A buyer cannot complete checkout if the Shipping Engine cannot find a valid service for the delivery destination and package weight.
Create a Shipping Zone
A shipping zone groups together the services you offer for one or more coverage areas. Give the zone a clear name that you will recognise.
Add Coverage Areas
Select the countries or supported areas to which the zone applies. Only offer destinations you can genuinely serve. Buyers outside your configured coverage will not receive that shipping service.
Add a Shipping Service
For each service, choose or enter:
- The carrier
- The service name
- Minimum transit days
- Maximum transit days
- Whether it is a next-day service, where applicable
- The relevant weight bands and charges
The carrier list is normally filtered to carriers associated with your country. If you need to use a carrier from another country, disable the country-only carrier filter.
If a carrier is missing, use the add-carrier facility and provide its name, country and correct website or tracking address. You can use your submitted carrier while it awaits review. If approved, it becomes part of the shared global carrier library. If rejected, it remains private to the seller who created it so existing services are not broken.
Add Weight Bands
Weight bands determine the shipping charge for packages within a defined weight range. Avoid gaps and unintended overlaps. Make sure your bands cover the packaged weights of the products you intend to sell.
Enter shipping charges in your seller currency. Xcat presents the appropriate amount to the buyer and preserves a canonical GBP accounting value for financial records.
Set Preparation and Dispatch Rules
Configure:
- Preparation days: the working days required to prepare an order
- Dispatch days: the weekdays on which you send parcels
- Cut-off hour: the cut-off used for any next-day delivery service
- Transit days: the carrier's expected delivery time after dispatch
Xcat combines preparation, dispatch and transit information to calculate an estimated delivery range for the buyer.
Per-Product Preparation Overrides
If one product needs longer preparation than your normal setting, use the per-product preparation-days override where available. Search using the product title, part of the title, the Xcat SKU or your own product SKU reference.
Shipping Records Are Preserved
When an order is placed, Xcat saves a shipping snapshot containing the seller, service, carrier, package weight, charges, currencies, preparation and transit settings, dispatch date and estimated delivery dates. Later changes to Shipping Settings do not rewrite historic orders.
5. Prepare Your Product Information
A complete and accurate listing is essential when you sell online. It is more likely to pass review quickly, appear in relevant searches and give buyers confidence.
Prepare the following before opening the listing form:
- A clear product title
- An accurate product description
- The correct primary category
- Relevant product specifications and attributes
- Brand, condition and model information where applicable
- Your selling price
- Available stock
- Your optional seller-controlled SKU or product reference
- A clear Master Product Image
- Useful Master Product Gallery images
- Accurate packaged weight, length, width and height
- Warranty information, where applicable
- Variation details for products with options
Use measurements for the product as it will be packed for dispatch. Shipping Weight, Length, Width and Height are used by the Shipping Engine and must not be guessed.
Product Images
The Master Product Image is the principal image shown in product listings and product pages. Gallery images provide additional views. Use sharp, well-lit images of the exact product and do not use misleading photographs.
Product Titles and Descriptions
Write for buyers first. Include the important product type, brand, model, size, compatibility or defining feature naturally. Avoid keyword stuffing, unsupported claims and promotional wording that does not identify the product.
The description should clearly explain what is supplied, its important features, condition, compatibility, dimensions and any limitations a buyer needs to understand.
6. Create a Listing to Sell Online
Open List Product.
Choose the Correct Listing Type
- Simple Product: use when the item is sold in one configuration.
- Product with Options: use when the buyer must choose options such as size, colour or specification.
Bundle, Digital and Service listing types may appear as future options but should not be used until they are enabled.
Creating a Product with Options
Add the product options first. Once there is at least one valid option, the Product Variations section becomes available. Each variation can have its own visibility, image, seller SKU, price and stock.
Variations initially use the Master Product Image. Select a separate variation image only when it helps the buyer distinguish that option. Removing an image override returns the variation to the Master Product Image.
Enter the first variation price carefully. Where the form offers price templating, the first price can fill only blank variation prices and should not overwrite prices already entered.
Categories
Choose the most accurate primary category. A primary category is included with the listing. An approved secondary-category placement may incur the current secondary-category fee. Add a secondary category only when it is genuinely relevant.
Review Before Submission
Before submitting, check:
- The product title accurately identifies the item
- The category is correct
- The description matches the actual product
- Price and stock are correct
- Every required specification is complete
- Images are clear and correctly assigned
- Variation combinations are accurate
- Packaged weight and dimensions are complete
- Your Shipping Settings cover the product and intended destinations
Submit the listing when all required information is complete.
7. Listing Review and My Listings
To help sellers sell online with accurate and trustworthy information, new products enter Xcat's product-submission review queue. Xcat checks listing quality, required data, category selection and marketplace compliance.
Use My Listings to:
- Search by a complete or partial product title
- Find products using an Xcat SKU or your seller reference
- Check whether a listing is pending, approved or published
- Edit eligible product information
- Submit product-change requests where review is required
- Pause, resume or retire a listing where those actions are available
Approval applies to the listing, not to ordinary seller registration. A standard seller can submit products without first becoming an approved Fulfilment & Sales Associate.
If you make a material change to an approved product, Xcat may review the proposed change before it replaces the published information.
8. Understand Seller Fees and Reserves
Xcat does not normally charge a monthly seller subscription or a fee simply to create a primary listing. Marketplace transaction fees are calculated when a sale is recorded.
The current default financial structure can include:
- A percentage marketplace commission
- A maximum commission cap
- A fixed order administration fee
- An approved secondary-category fee
- A temporary reserve hold for marketplace seller protection
- Payment-processing or other disclosed transaction charges where applicable
Default settings may change, and a specialist category or future fee profile may use different rules. The financial summary and Sales Ledger provide the transaction-specific record.
Marketplace sellers may have part of their proceeds held temporarily in reserve to protect buyers, sellers and the marketplace against refunds and disputes. Xcat-owned/Admin sales are not subject to the marketplace seller reserve.
9. Receive and Process Orders
Receiving and fulfilling orders is the next stage when you sell online. When a buyer orders one of your products, open Orders.
Orders is the operational fulfilment area. It is different from Sales, which is the financial history of completed or recorded sale transactions.
Select Process Order for the relevant order. Review:
- The products and quantities belonging to you
- The delivery details you are authorised to see
- The selected shipping service
- The dispatch and estimated delivery dates
- The current order or fulfilment status
- Any buyer or order notes relevant to fulfilment
In a mixed basket, a buyer may purchase from several sellers in one checkout. Xcat separates the basket into seller-owned shipping and fulfilment packages. You can process only the part of the order belonging to you.
10. Add Carrier and Tracking Details
Inside Process Order:
- Select the carrier used for the shipment.
- Enter the tracking number accurately.
- Select the required order or fulfilment action.
- Press Update order.
The carrier, tracking details and selected status are saved together. Do not leave the page without pressing Update order.
Ready to Post
Use Ready to Post when your seller-owned shipment has been prepared and is ready for dispatch. The Orders page should then show the updated status rather than continuing to show Processing.
Completing an Order
A single-seller order can complete when its required fulfilment is complete. A mixed-basket order must not be treated as fully complete until all applicable seller portions are complete.
When the overall order is completed, WooCommerce sends the completed-order email using the available carrier and tracking information. Xcat can also create an internal message confirming that the purchase order is complete and dispatched. That automated notification is designed not to create a duplicate ordinary “You have a new message” email.
11. Sales, Sales Ledger and Purchase Ledger
Sales
Open Sales to review the financial history associated with completed or recorded seller transactions.
Sales Ledger
Open the Sales Ledger to see the accounting record for:
- Sale proceeds
- Marketplace and transaction fees
- Available balance
- Reserve or held balance
- Pending payouts
- Refunds
- Debt or recovery entries
- Completed payouts and withdrawals
Xcat uses GBP as its immutable canonical accounting currency. Sellers can view and enter relevant amounts in their own currency, while Xcat preserves the corresponding GBP value and conversion evidence used for the transaction.
A later exchange-rate change does not rewrite old transactions. The original source amount, currency, conversion rate and canonical GBP value remain attached to the historic record.
Purchase Ledger
Every registered user can also have a Purchase Ledger. This is the buyer-side record of purchases and related adjustments. It is separate from the seller Sales Ledger.
12. Refunds and Disputes
When a Buyer Requests a Refund
A buyer can open Request Refund, search purchase history and raise a full or partial request for a specific seller-owned transaction or product. Xcat records the request in the buyer's refund history and sends the relevant seller an internal notification.
The seller can review the request and either accept or reject it:
- Accept: the seller records agreement and the case proceeds to Admin for the actual WooCommerce or payment refund.
- Reject: the rejection automatically triggers a dispute for formal review.
Xcat's refund request system records and controls the workflow. Admin performs the actual transfer of money through WooCommerce or the appropriate payment system.
Seller-Initiated Refunds
To initiate a refund, open Send Refund. Search for the appropriate seller-owned transaction, enter the required information and submit the request. The refund history records its progress.
Enter the amount in your seller currency. Xcat converts it once to the canonical GBP accounting value. It must not be converted a second time when another user views the record in their own currency.
Refund Before Order Completion
If a refund is agreed before completion, Admin can refund from the buyer's held purchase funds. The seller's ledger should not receive completed sale proceeds prematurely. For a partial refund, only valid remaining proceeds—after applicable fees, debt and other adjustments—become eligible after fulfilment and completion.
Refund After Order Completion
If a refund is agreed after completion, Admin performs the refund and Xcat adjusts the seller's available funds, held amounts and Sales Ledger as required.
If the seller's funds are insufficient, Xcat may withhold funds and require the seller to add money within a specified period. Admin may freeze the seller account while the deficit remains. Failure to resolve the deficit may lead to suspension of active listings, subject to Admin review and marketplace policy.
Disputes
Open Disputes to review cases involving your seller transactions. A dispute does not automatically decide that either party is right.
Admin can consider:
- The original listing information
- The order and payment records
- Internal messages
- Shipping, carrier and tracking evidence
- Delivery and fulfilment records
- The refund history
- Evidence supplied by the buyer and seller
- Applicable Xcat policies
Respond within any stated deadline and keep evidence inside the relevant dispute or Messages thread so it remains connected to the correct transaction.
13. Configure and Request Payouts
Getting paid completes the main commercial workflow when you sell online. Open Payouts to configure an available payout destination and review your payout balances.
The Payouts page can show:
- Available funds
- Reserve or held funds
- Pending payout amounts
- Seller debt or recovery amounts
- The amount currently eligible for withdrawal
Add a Payout Method
Enter the supported Bank or PayPal details available for your country and account. Check every detail before saving. Sensitive payout information is protected, but an incorrect account number, routing detail, email address or beneficiary name can delay payment.
Submit a Payout Request
- Confirm that you have sufficient eligible available funds.
- Select your saved payout destination.
- Enter the amount in your seller currency.
- Add an optional reference or description where useful.
- Submit the request.
The request moves into Pending status for Admin processing. Funds committed to a pending payout cannot be requested again.
You enter and view the payout in your seller currency. Admin sees the canonical GBP accounting amount. This is one payout with two accounting views, not a second conversion or an additional payment.
When Admin completes the transfer, the payout status and Sales Ledger are updated. If a pending request is cancelled, the committed amount returns to the appropriate available balance and no completed-payout ledger entry is created.
14. Messages, Help and Seller Support
Use Messages for internal conversations connected with marketplace activity. Keep order, refund and dispute information in the appropriate Xcat thread whenever possible.
For self-service guidance, search the Help Center. It covers registration, listings, shipping, orders, fulfilment, currency, ledgers, payouts, refunds, disputes and marketplace policies.
If the answer is not available, open Seller Support. Include the relevant order number, product, listing, payout reference, refund or dispute reference so the Admin team can investigate efficiently.
New Seller Launch Checklist
- Register your Xcat account
- Follow the email link and set your password
- Log in and remain logged in while using Seller Area links
- Confirm your account country and seller currency
- Complete My Shop Settings
- Create shipping zones and coverage areas
- Add at least one complete shipping service
- Add weight bands covering your packaged product weights
- Set preparation days, dispatch days and any next-day cut-off
- Prepare accurate product information and images
- Enter packaged weight and dimensions
- Choose the correct listing type
- Check all variations, prices and stock
- Submit the product for review
- Monitor My Listings for status or requested changes
- Configure a payout method before funds become eligible
- Monitor Orders, Messages, refunds and disputes regularly
Next, learn how to create stronger product listings: Read How to Sell on Xcat: Create Better Product Listings .
Ready to Sell Online with Xcat?
Already registered and logged in? You are ready to sell online. Open the Seller Dashboard to begin, or go directly to List Product after completing My Shop and Shipping Settings.
Not registered yet? Register, follow the email link to set your password, then log in and return to this guide to start selling online with Xcat.